2.1 Startup Guide
2.1.1 Startup While Suspended (Gantry Required) (Recommended for SDK use)
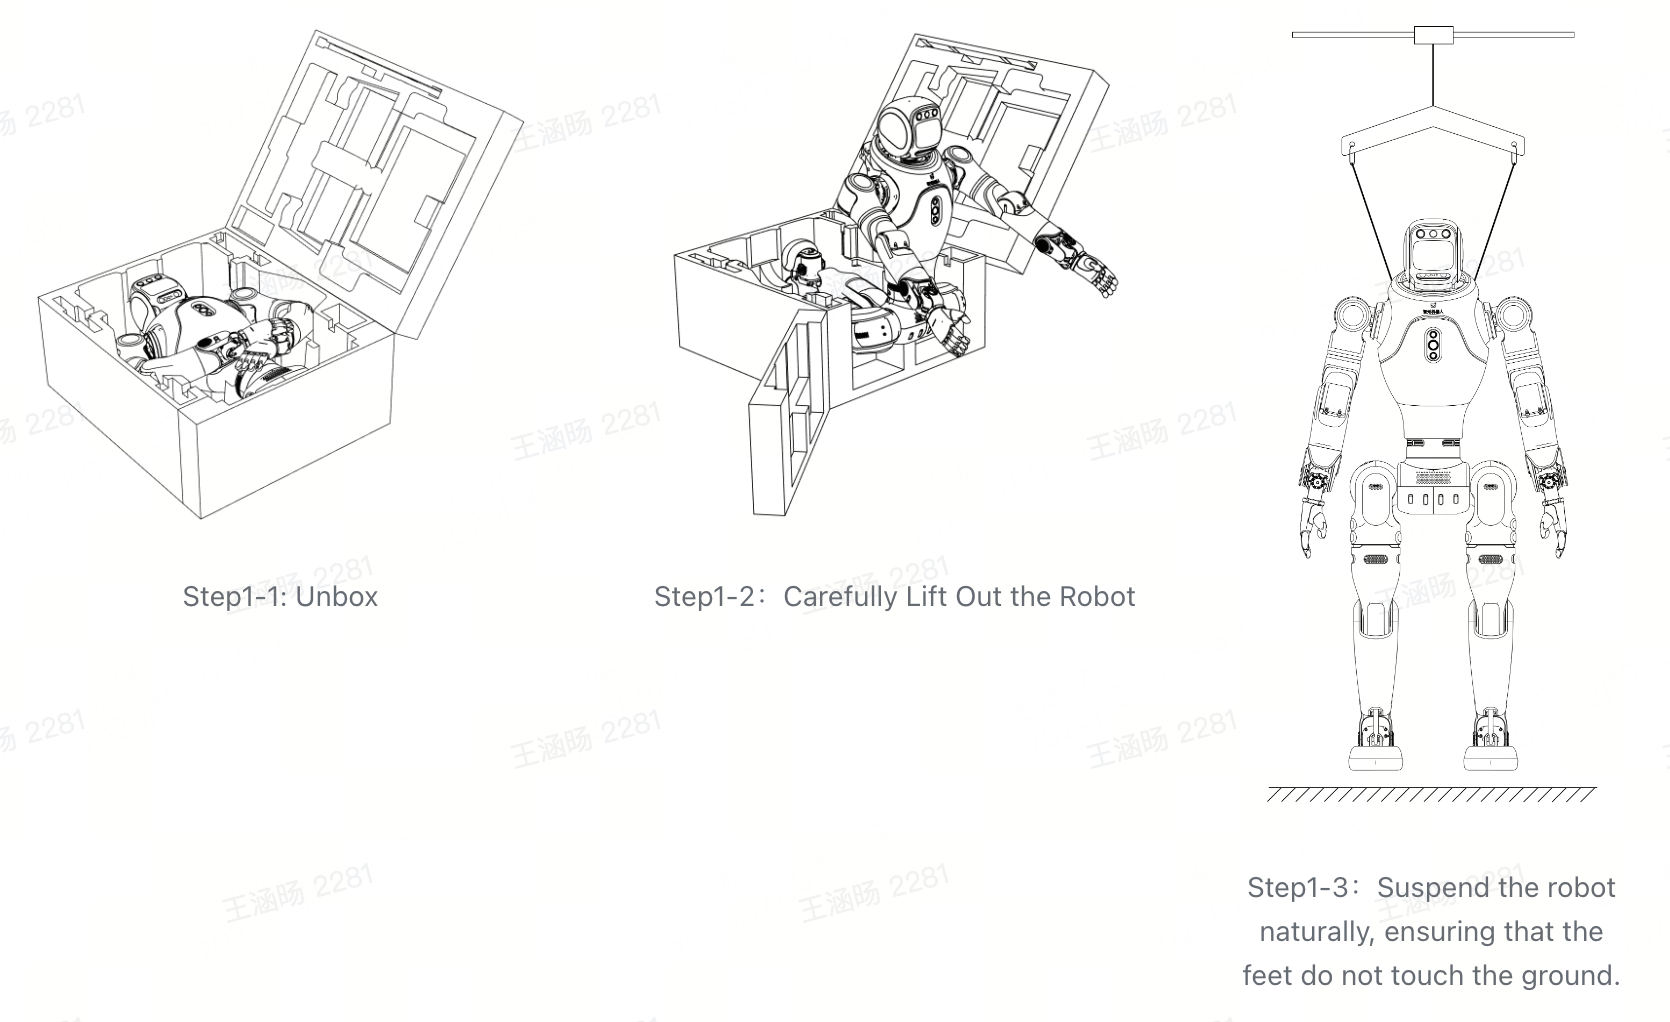
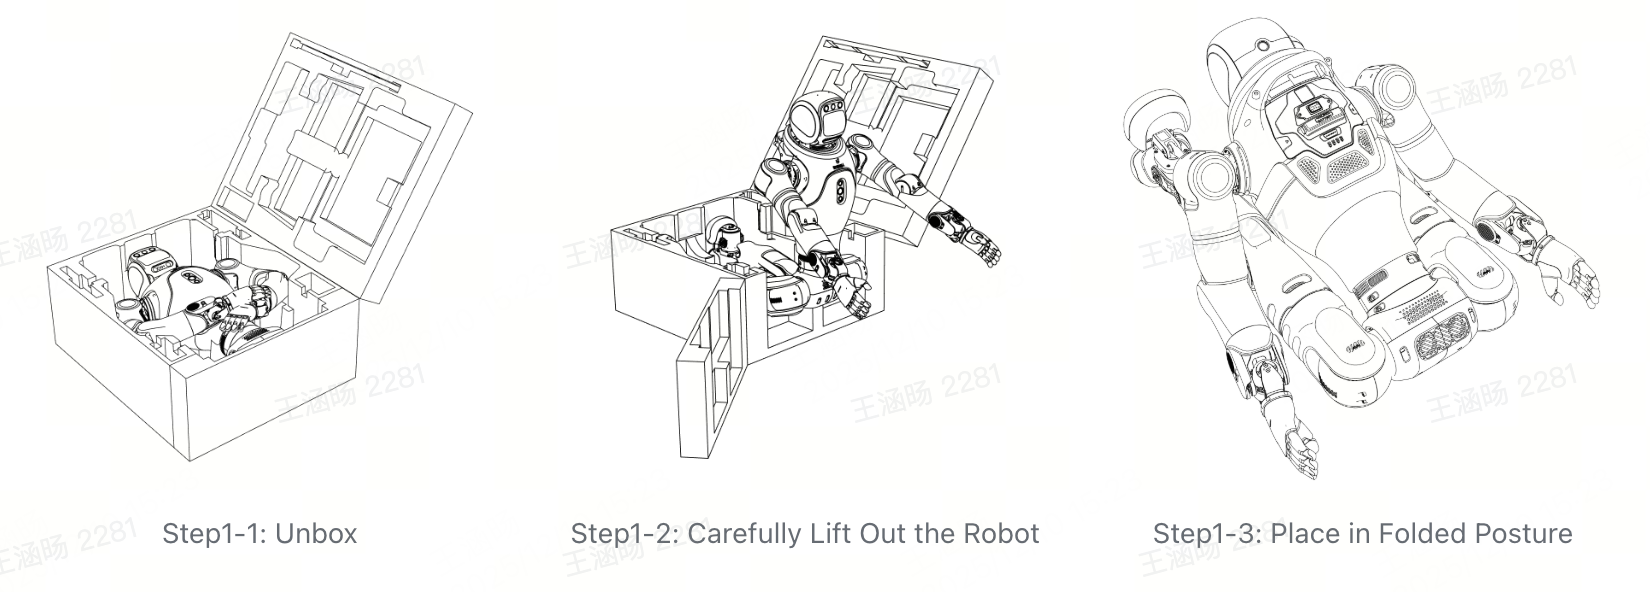
Step 1: Unbox and Position Properly Open the package as shown and carefully lift the robot out. Use the support frame to suspend the robot naturally, ensuring that the feet do not touch the ground.
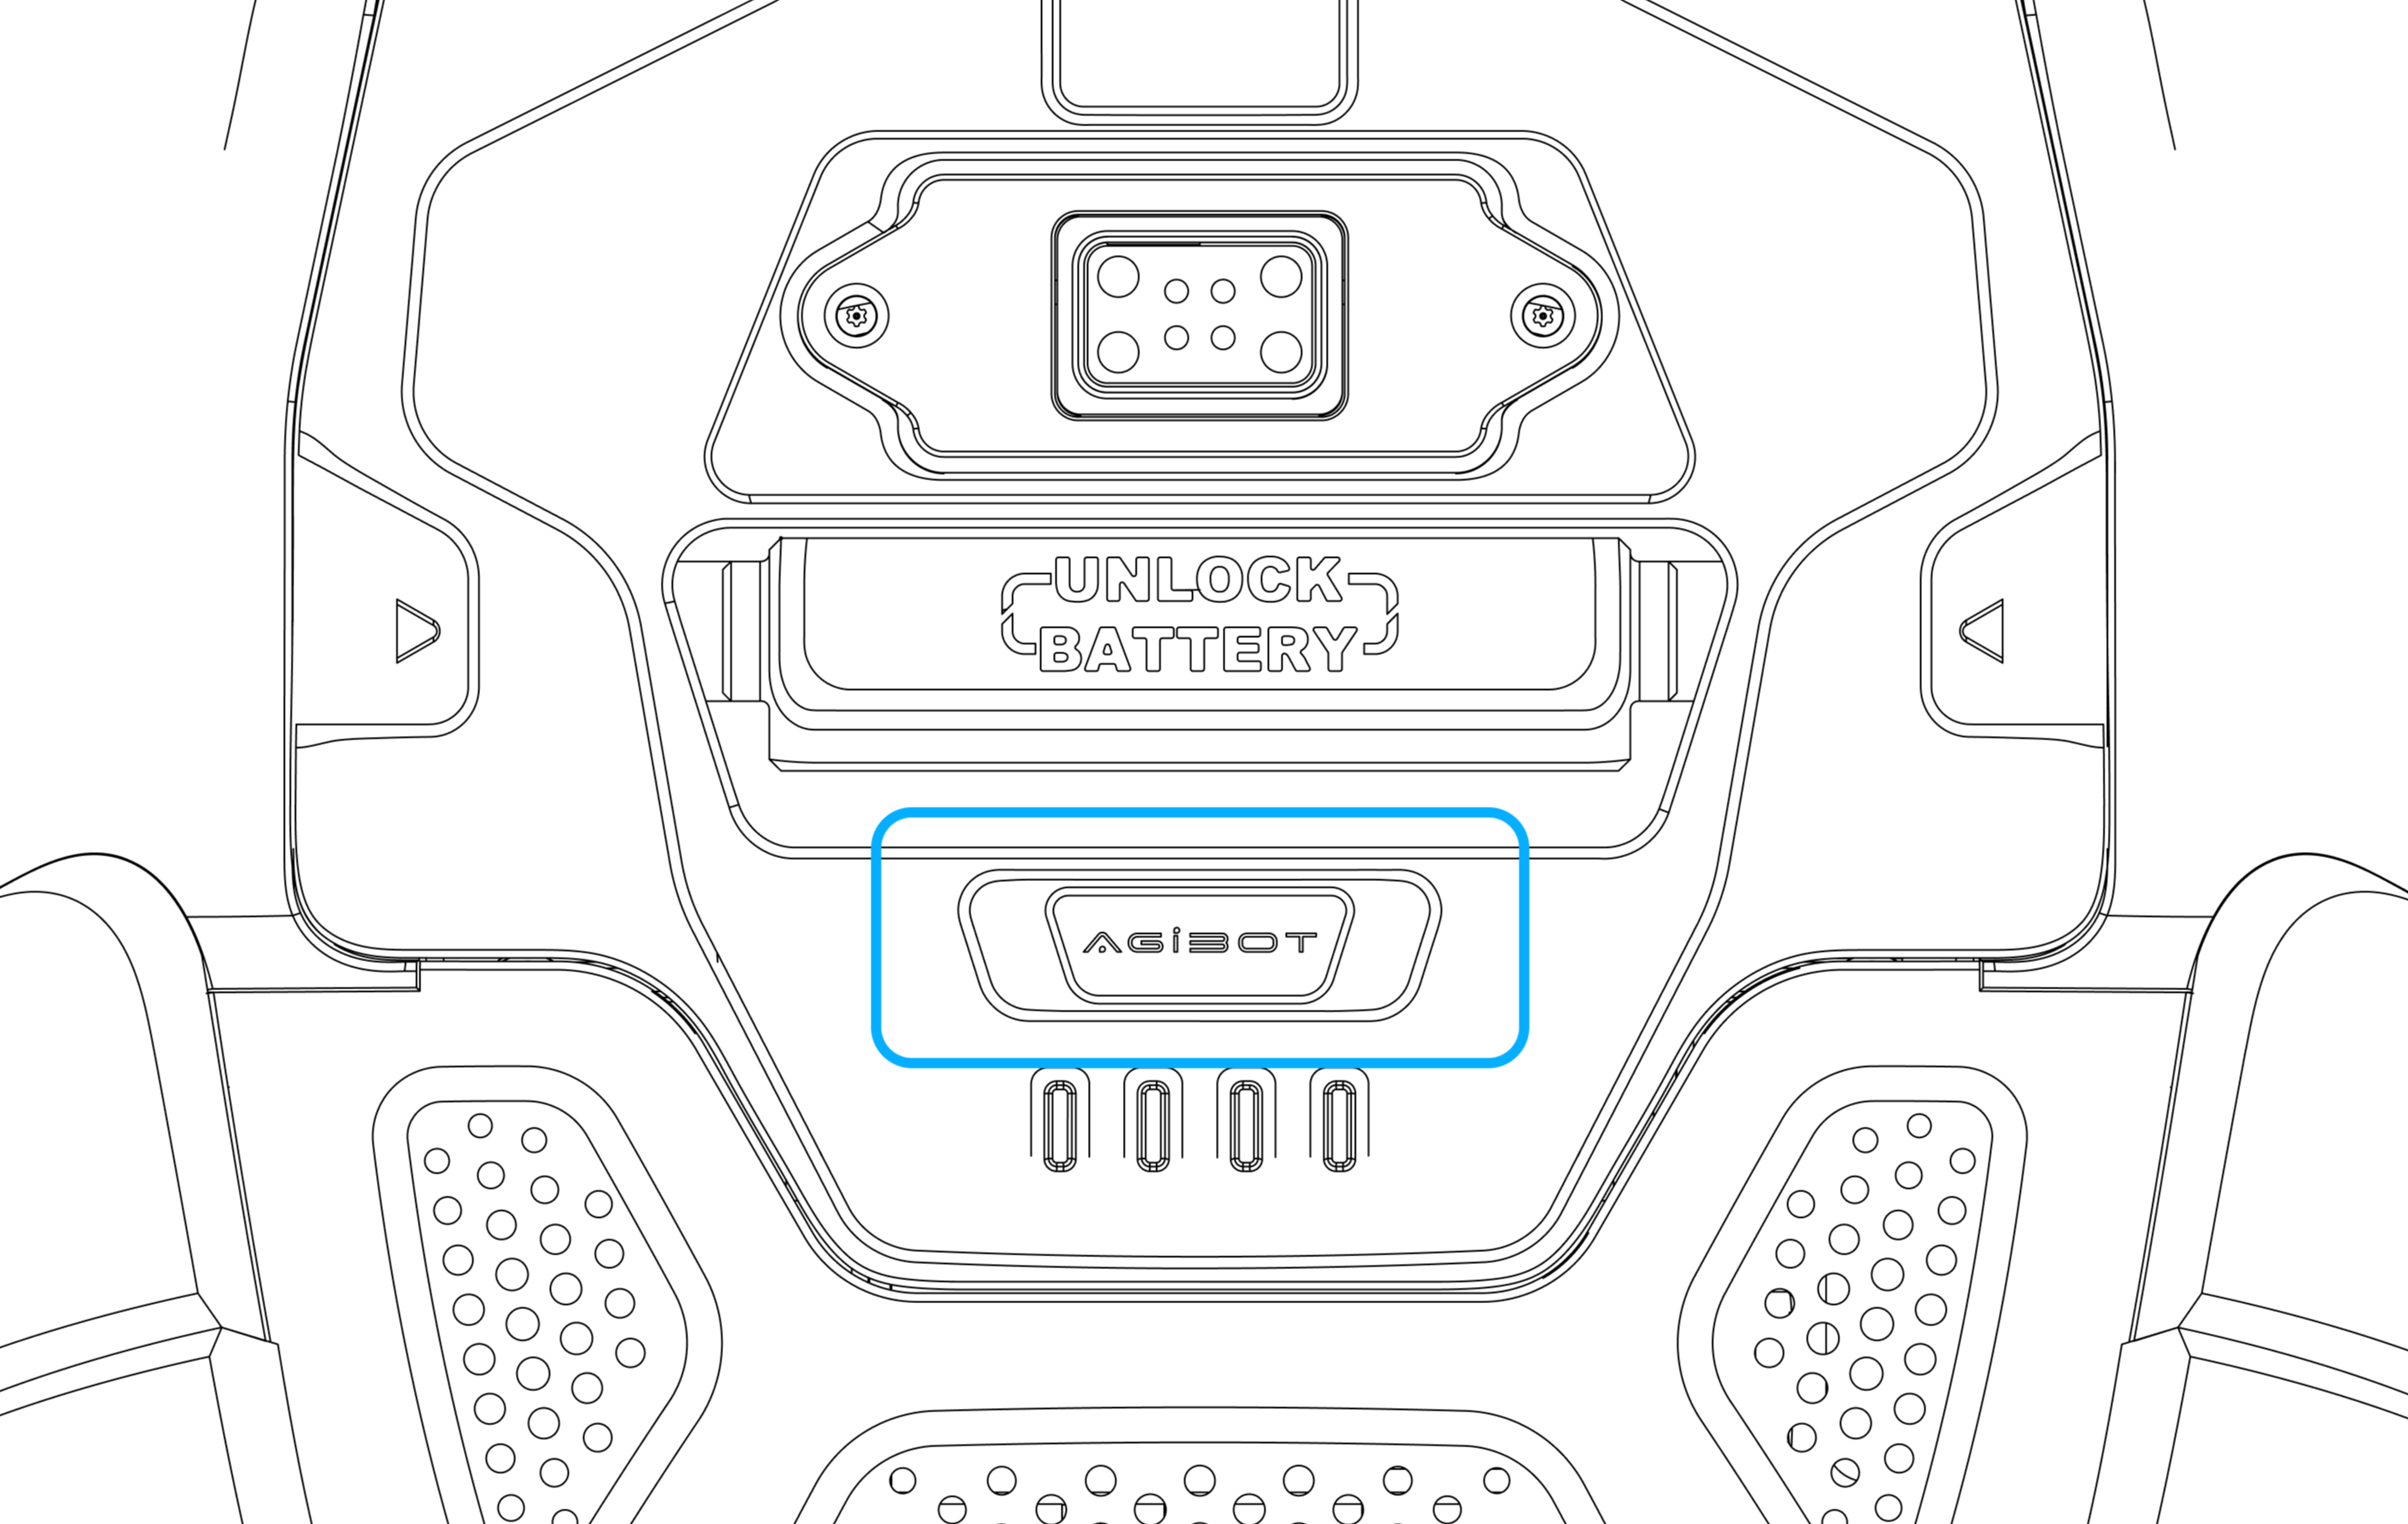
Step 2: Install the Battery If the battery is not installed, slide it from the outside into the battery slot on the robot’s back. When fully inserted, a ‘click’ sound indicates successful installation. Press again to ensure the battery is securely seated.

Step 2: Check and Install the Battery
Step 3: Power On
Before powering on, ensure the battery has more than 2 bars (over 50%).
Short-press the power button on the battery to wake the device, then long-press for 5 seconds to start up.
After powering on, the battery’s LED1–4 indicators will light up sequentially within 2 seconds, then stabilize to show battery level.
Step 3: Press the Power Button
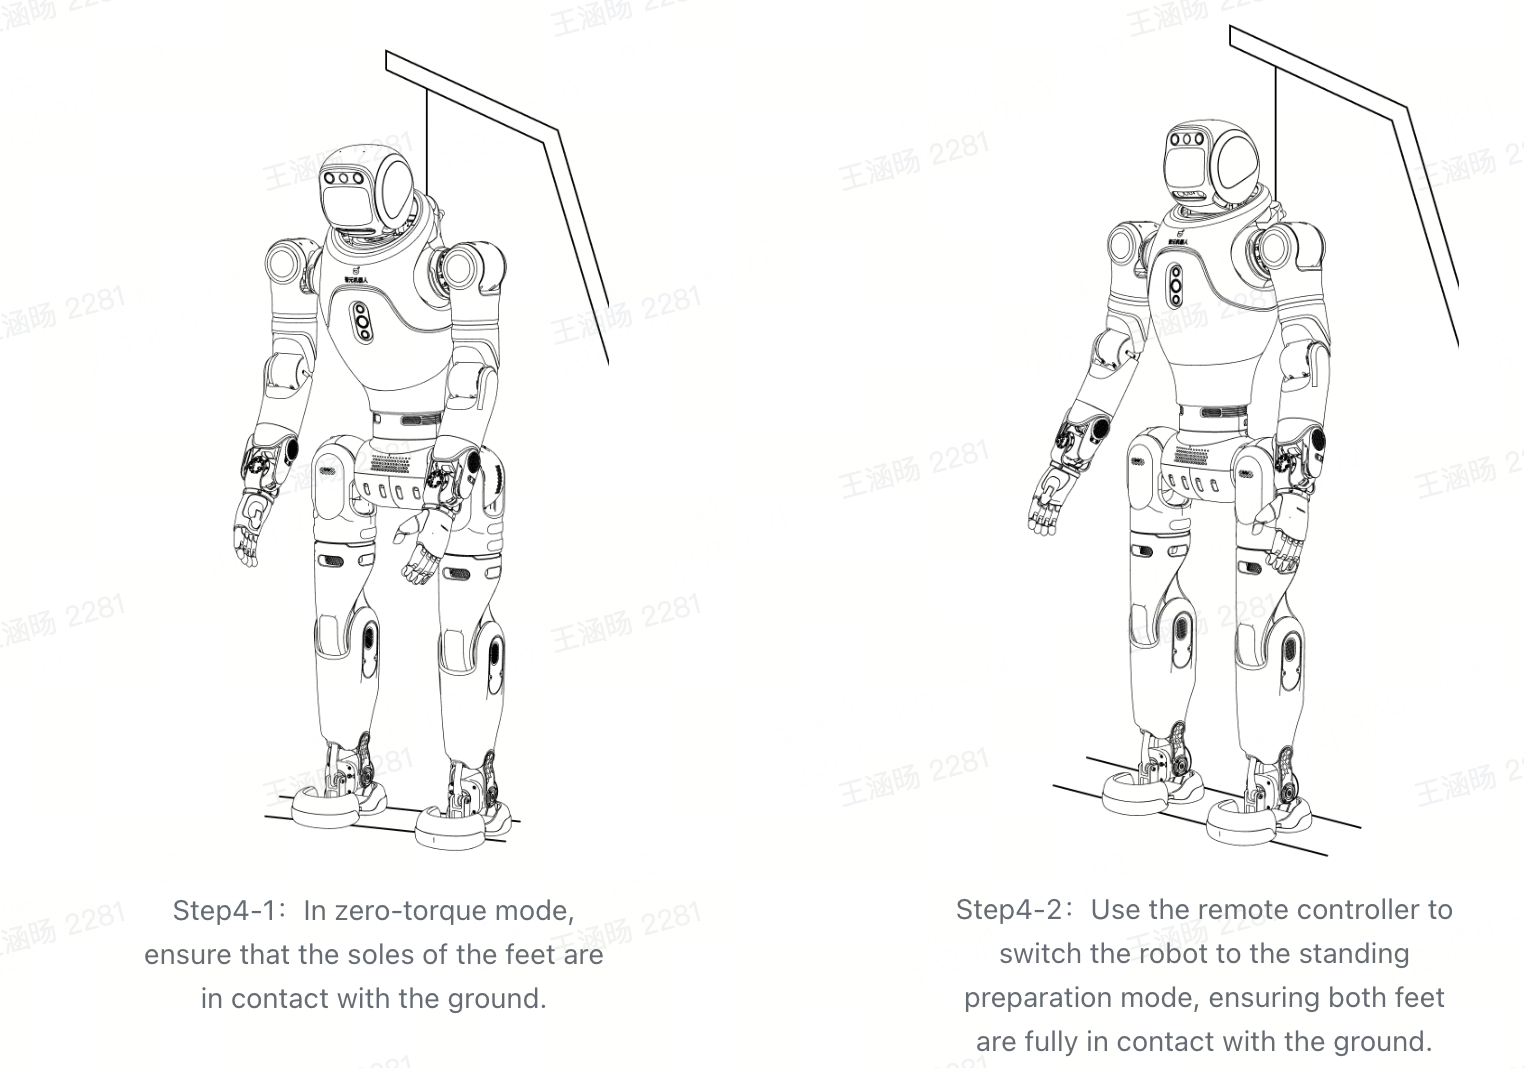
Step 4: Switch to Standing Preparation (Position-Control Standing) Mode
Initialization: After powering on, wait about 1 minute without operating the robot. When all joints enter zero-torque mode, initialization is complete.
Adjust Suspension: After initialization, lower the suspension rope until both feet fully touch the ground, transitioning into standing-prep mode.
Activate Standing-Prep Mode: Short-press 【L2 + X】 on the controller to enter Standing Preparation (Position-Control Standing) Mode.
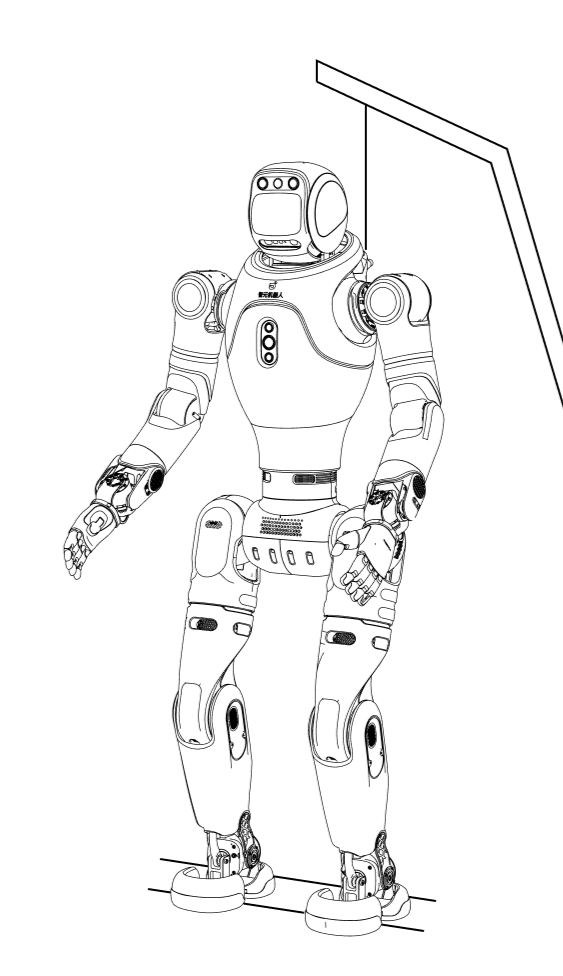
Step 5: Complete Body Lowering
Use the powered gantry to slowly lower the robot until both feet fully touch the ground and the suspension rope becomes slack with extra margin.
Ensure the robot remains upright during the process without tilting.
Step 6: Enter Stable Standing (Force Control Standing) Mode
Important
Note: Ensure the robot is fully lowered and both feet are fully touching the ground before switching to Stable Standing Mode.
Activate Stable Standing Mode: Short-press 【R2 + X】 on the controller to switch to Standing Preparation (Position-Control Standing) Mode. Refer to the illustration for posture details.
Release the Hook: Once the robot is stably standing, fully release the suspension hook.
In Stable Standing Mode, the robot maintains balance under slight pushes and supports body motion control.
Step 6: Switch to Stable Standing (Force Control Standing) Mode via Remote
Step 7: Enter Locomotion Mode
After entering Stable Standing Mode, the robot supports “push-to-walk” behavior:
Use the left joystick (up/down/left/right) to control walking direction.
Push the right joystick to control in-place rotation.
2.1.2 Startup from Supine Position (No Gantry Required)
Step 1: Unbox and Position Properly Open the package as shown and gently lift the robot to avoid collisions. Position the robot as shown to check battery level or install the battery.
Step 2: Install the Battery Slide the battery into the back slot until a ‘click’ confirms installation. Gently pull to ensure it is securely locked.

Step 2: Check and Install the Battery
Step 3: Power On
Before powering on, ensure the battery has more than 2 bars (over 50%).
Short-press the power button on the battery to wake the device, then long-press for 5 seconds to start up.
After powering on, the battery’s LED1–4 indicators will light up sequentially within 2 seconds, then stabilize to show battery level.
Step 3: Press the Power Button
Step 4: Lay the Robot Flat on Its Back
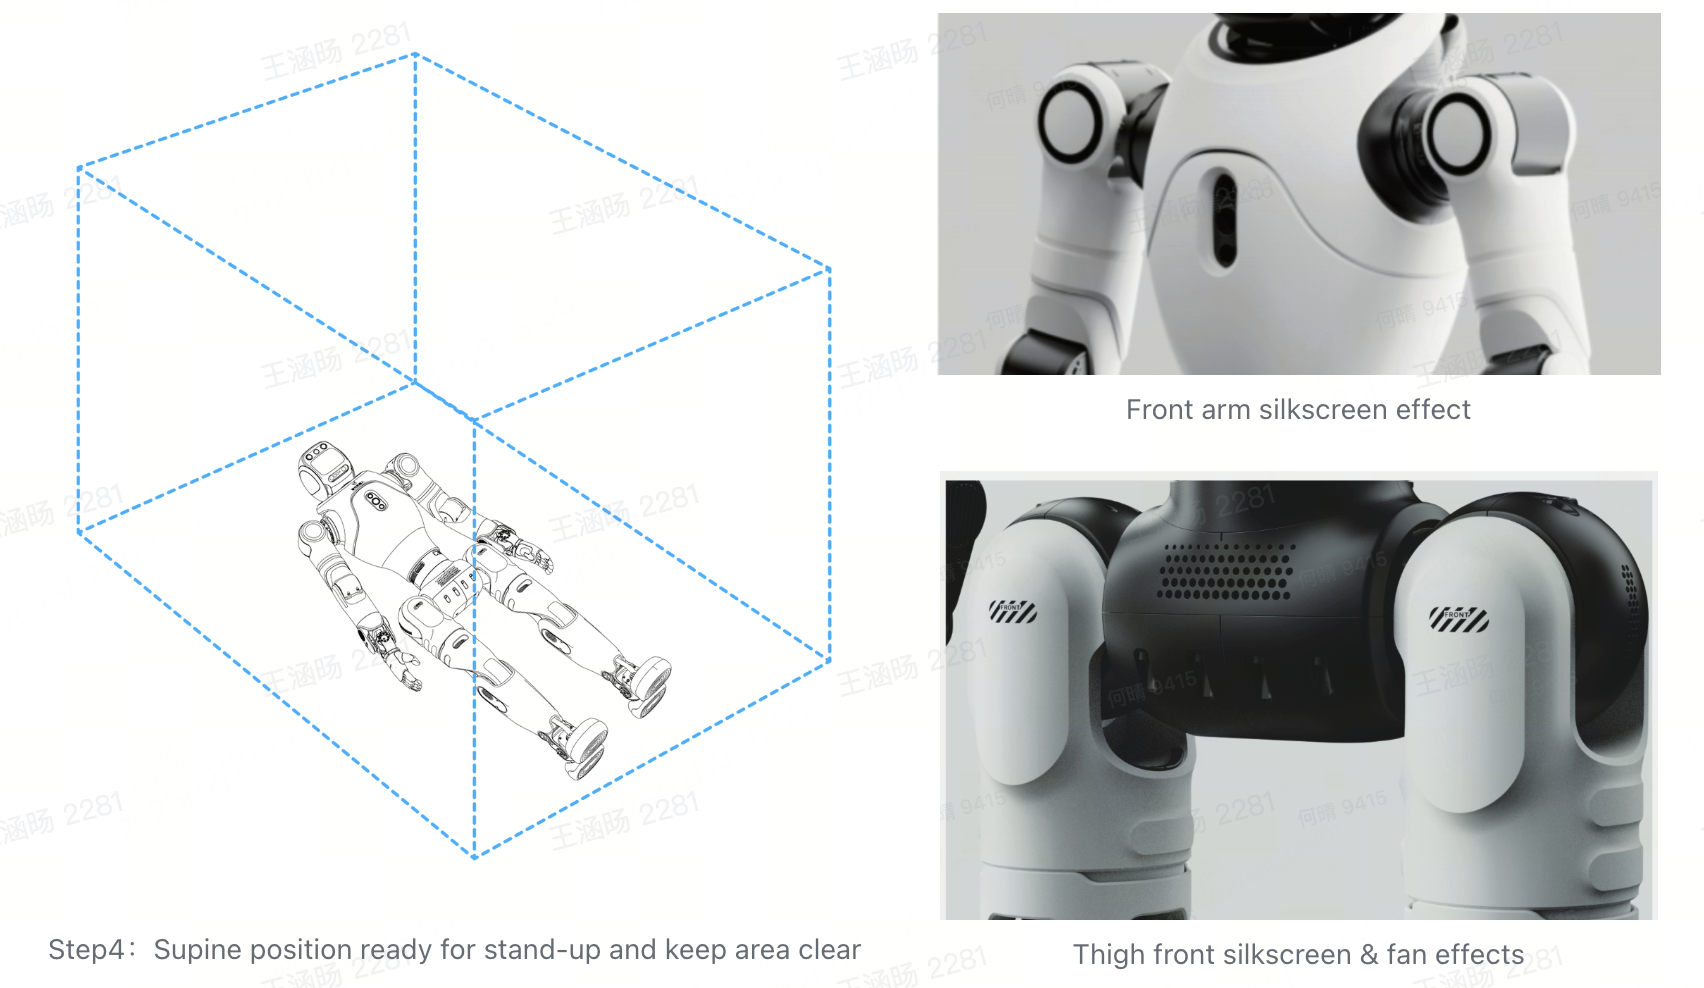
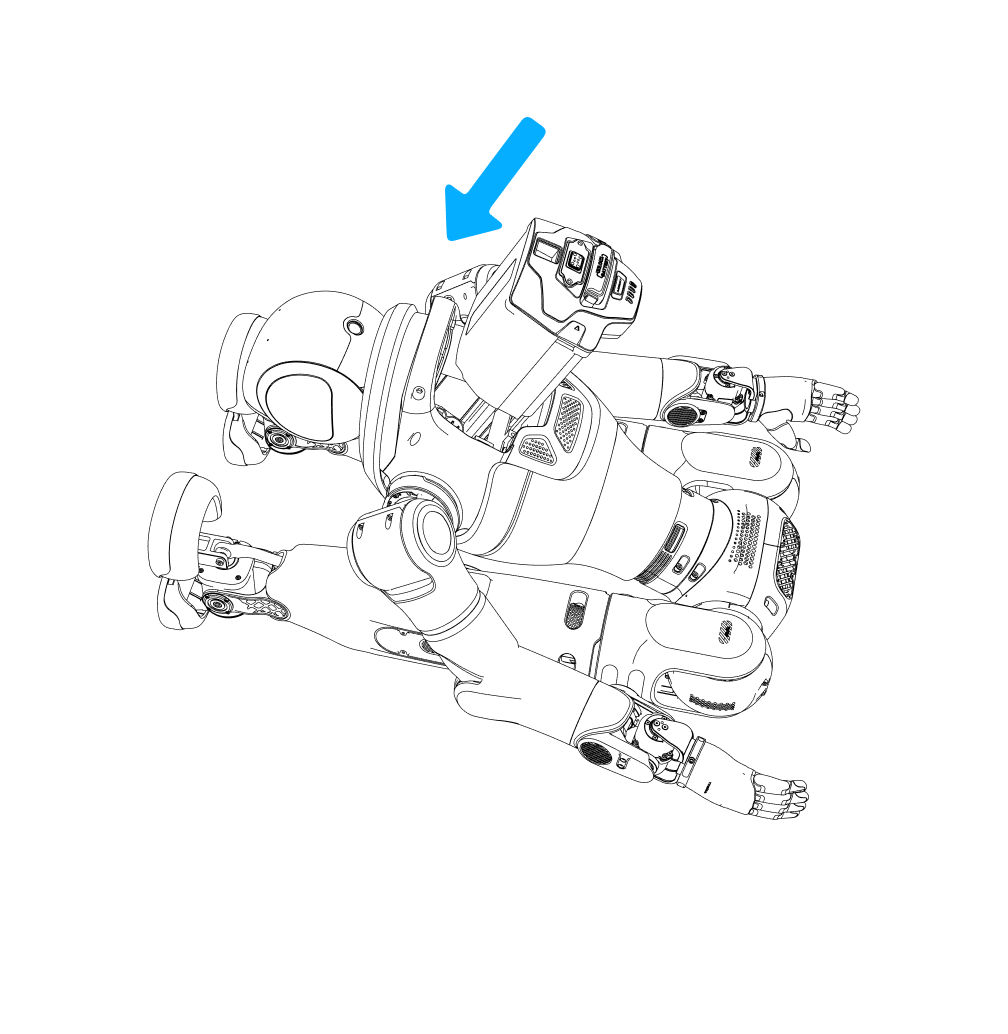
Place the robot in a face-up lying posture with arms and legs extended. The robot is now in zero-torque mode. Refer to the illustration to correctly position the head, legs, arms, torso, waist, and hips, ensuring the hip orientation matches the robot’s forward direction.
Ensure a 0.5m radius of clear space around the robot before triggering the stand-up-from-lying motion.
Step 5: Execute Supine-to-Stand Power-On
Short-press 【↑ + △】 on the controller to trigger the supine-to-stand motion. The robot will then enter stable Stable Standing Mode.
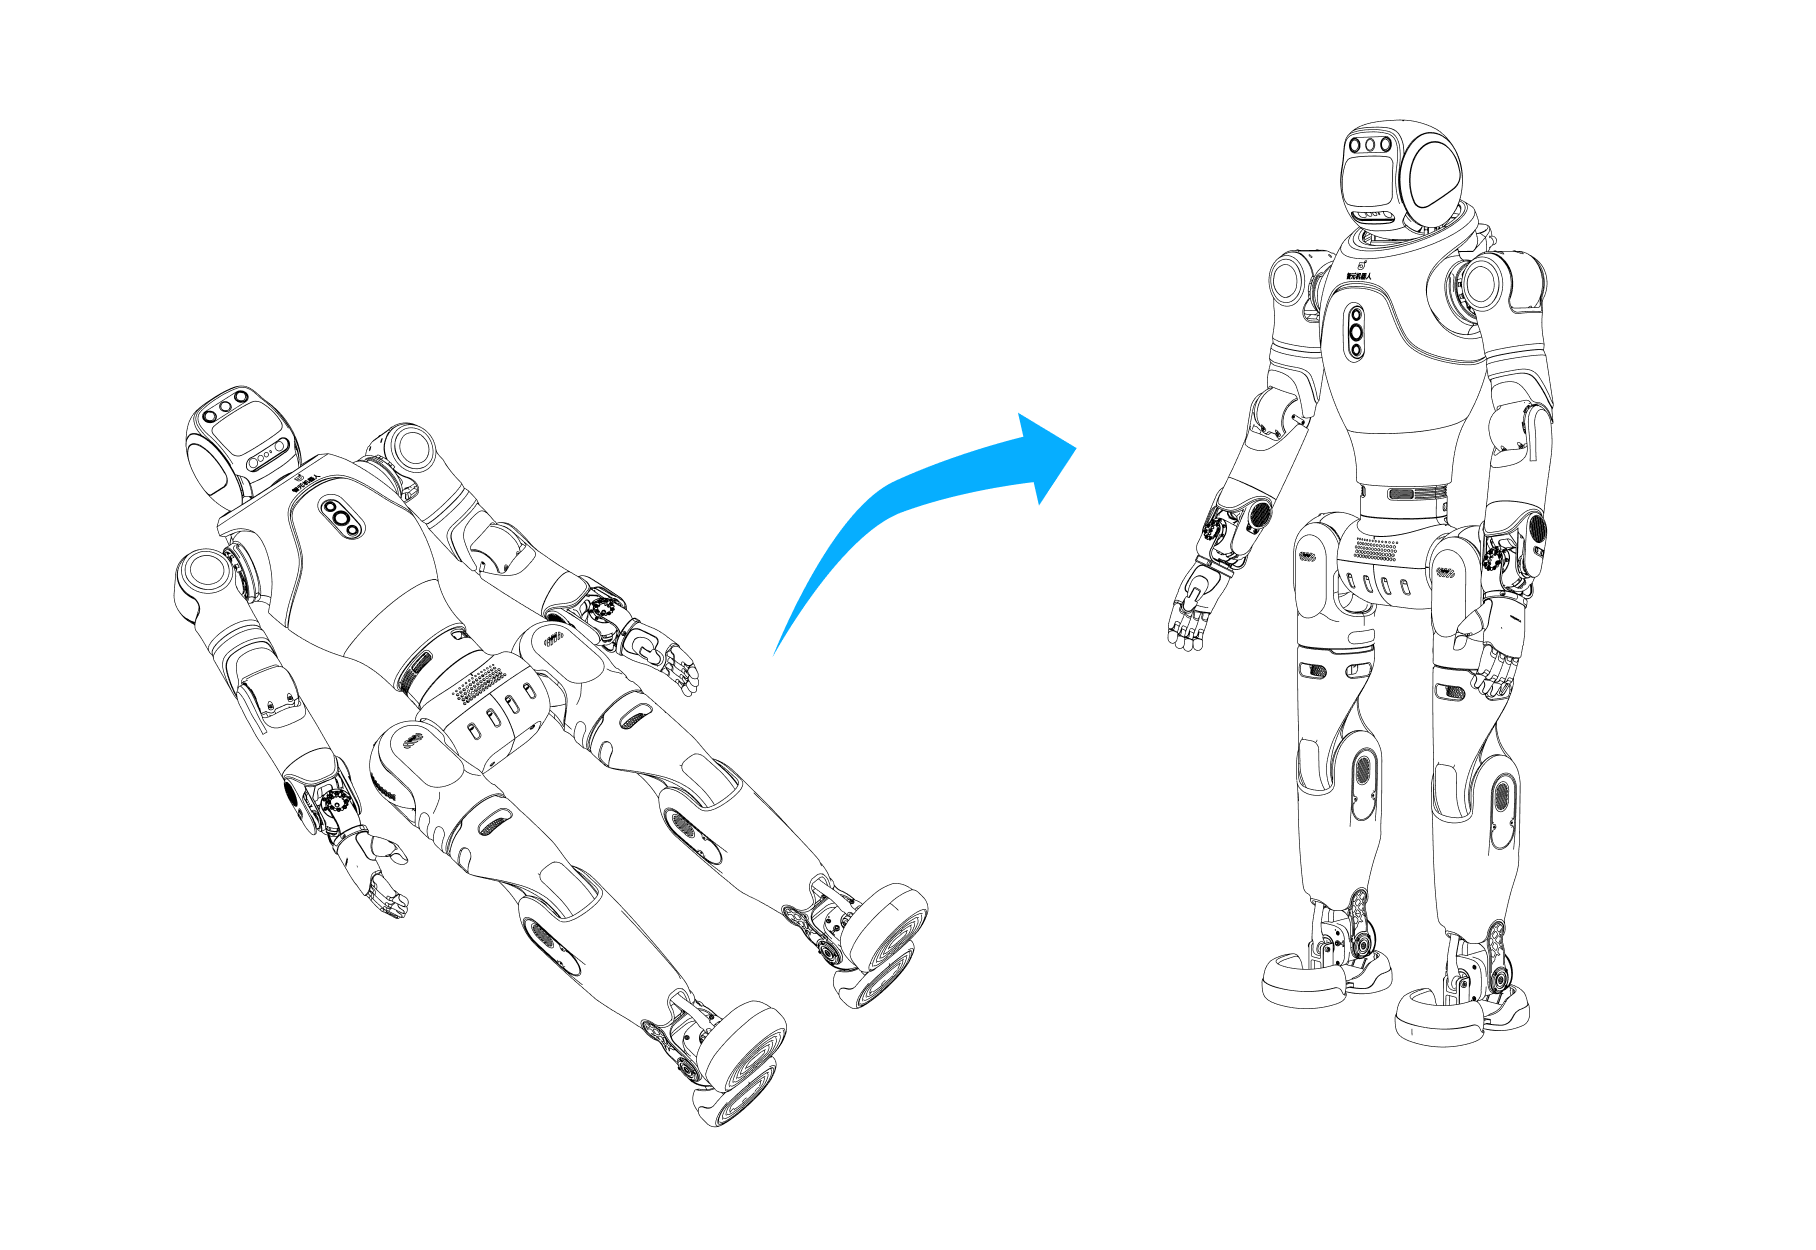
Step 5: Supine-to-stand motion illustration
Step 6: Enter Locomotion Mode
After entering Stable Standing Mode, the robot supports “push-to-walk” behavior:
Use the left joystick (up/down/left/right) to control walking direction.
Push the right joystick to control in-place rotation.
Important
Do Not Perform Supine-to-Stand in the Following Cases: When using the dexterous hand or gripper, standing up from lying is not supported to avoid hardware damage.
Posture Requirements Before Standing Up: Ensure the robot is face-up and all limbs and critical parts are positioned correctly to avoid damage.
Ground Requirements: Place the robot on a flat, hard surface with no slope before performing the stand-up motion.
2.1.3 Startup from Sitting Position (No Gantry Required)
Step 1: Unbox and Position Properly Open the robot’s package as shown and lift it out carefully. Position the robot as shown to check the battery or install it.
Step 2: Install the Battery Slide the battery into the back slot until a ‘click’ confirms installation. Gently pull to ensure it is securely locked.
Step 2: Check and Install the Battery
Step 3: Power On
Before powering on, ensure the battery has more than 2 bars (over 50%).
Short-press the power button on the battery to wake the device, then long-press for 5 seconds to start up.
After powering on, the battery’s LED1–4 indicators will light up sequentially within 2 seconds, then stabilize to show battery level.
Step 3: Press the Power Button
Step 4: Position the Robot in Sitting Posture
Posture Adjustment: Position the robot as shown.
Key Requirements:
Ensure the head, legs, arms, chest, waist, and knees are positioned correctly, especially keeping the knees facing the same direction as the robot’s front.
Place the robot on a chair 35–40 cm high with a backrest to ensure proper support.
The robot is now in zero-torque mode. An operator should hold the rear handle to maintain balance.
Mode Activation: Press 【↑ + X】 simultaneously to enter sitting-prep (position-control sitting) mode.
During this process, an operator must hold the robot’s rear handle for balance.

Step 4: Robot Positioned in Sitting Posture, Switching to Sitting-Prep Mode
Important
Sitting Posture Requirements: Use the controller to adjust the robot into the sitting position-control state. Place the robot on a stable stool 35–40 cm high. Ensure both feet fully touch the ground before triggering the stand-up motion.
Limb Posture Requirements: Ensure the head, legs, arms, chest, waist, and hips are positioned correctly and facing forward to avoid damage during mode switching.
Step 5: Stand Up
Short-press 【↑ + □】 on the controller to trigger the stand-up-from-sitting motion. The robot will automatically enter Stable Standing Mode afterward.
Important
An operator must pull on the rear handle to assist balance during the stand-up-from-sitting motion to prevent falls.
Step 5: Robot Standing Up
Step 6: Enter Locomotion Mode After entering Stable Standing Mode, the robot supports “push-to-walk” behavior:
Use the left joystick (up/down/left/right) to control walking direction.
Push the right joystick to control in-place rotation.