2.4 Shutdown Guide
2.4.1 Assist the Robot to Lie Down (No Gantry Required)
Important
After the robot switches into the Standing Preparation (Position-Control Standing) mode and before it is fully laid on the ground, ensure one or two operators assist in keeping the robot stable and balanced.
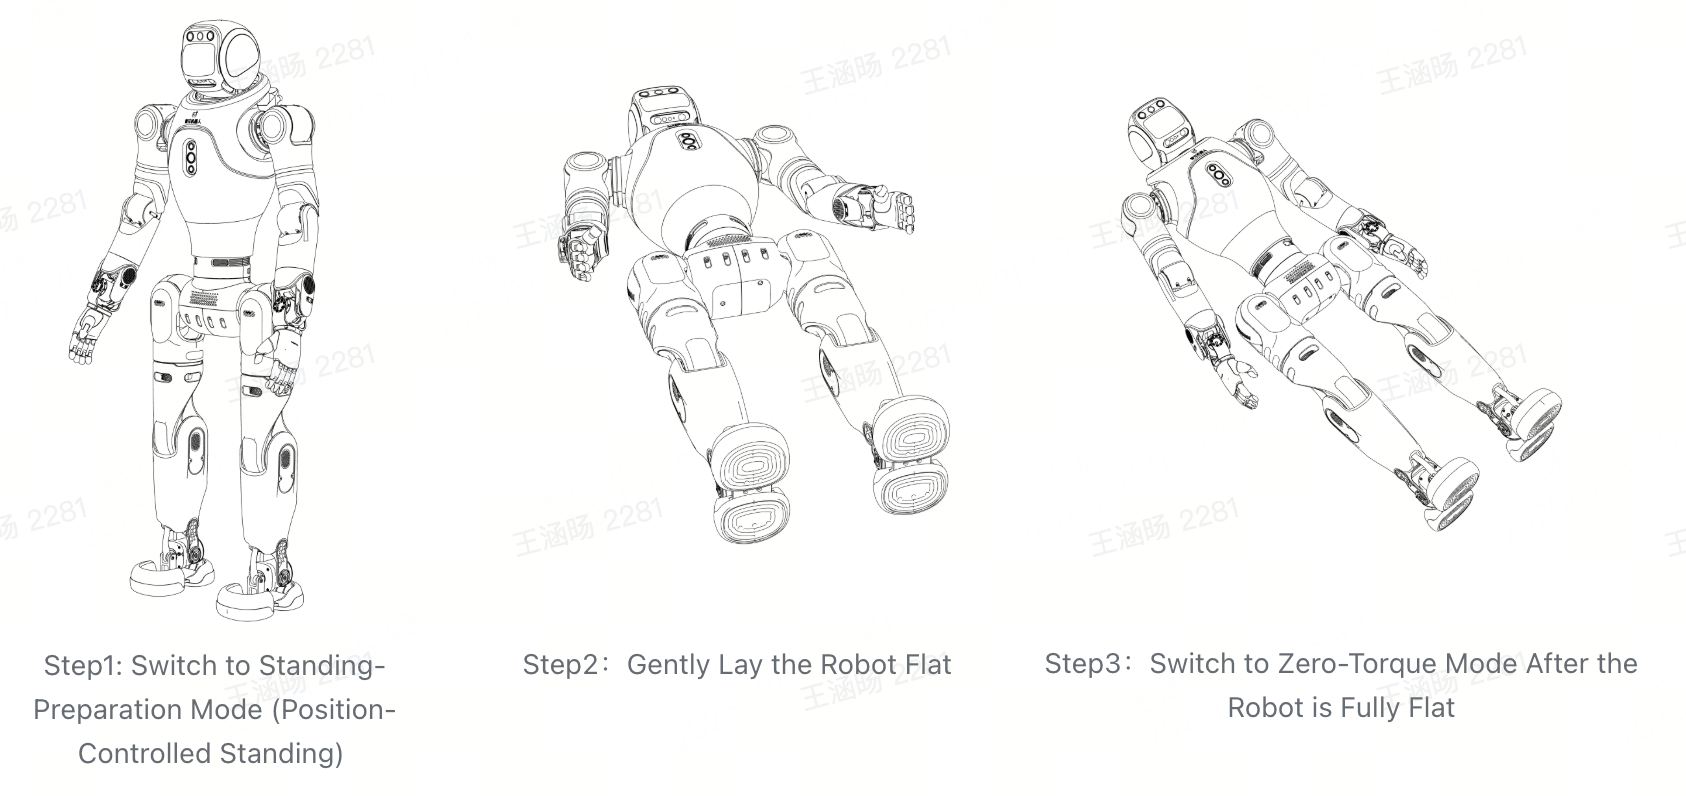
Step 1: Enter Standing Preparation Mode (Position-Control Standing)
Short-press [L2 + X] on the controller to switch the robot into Standing Preparation (Position-Control Standing) mode.
During the operation, manually support the robot from the rear handle to prevent imbalance or falling.
Step 2: Lay the Robot Down
Slowly lower the robot from the standing posture in Standing Preparation mode to the ground, ensuring a controlled and steady movement.
It is recommended that at least two operators assist to avoid the robot tipping or entering an abnormal posture during the process.
Step 3: Enter Zero-Torque Mode
After ensuring the robot is stable and facing forward, switch it to Zero-Torque Mode using the remote controller to ensure safe shutdown.
During the state transition, support the robot from the rear handle or secure its back against a chair to maintain balance.
Recommended Procedure (Safer):
First switch to Damping Mode: short-press [L2 + R2 + Create] on the controller.
Then switch to Zero-Torque Mode: short-press [L1 + R1 + Create] on the controller.
Emergency Stop Procedure: If an immediate stop is required, directly switch to Zero-Torque Mode via the controller.
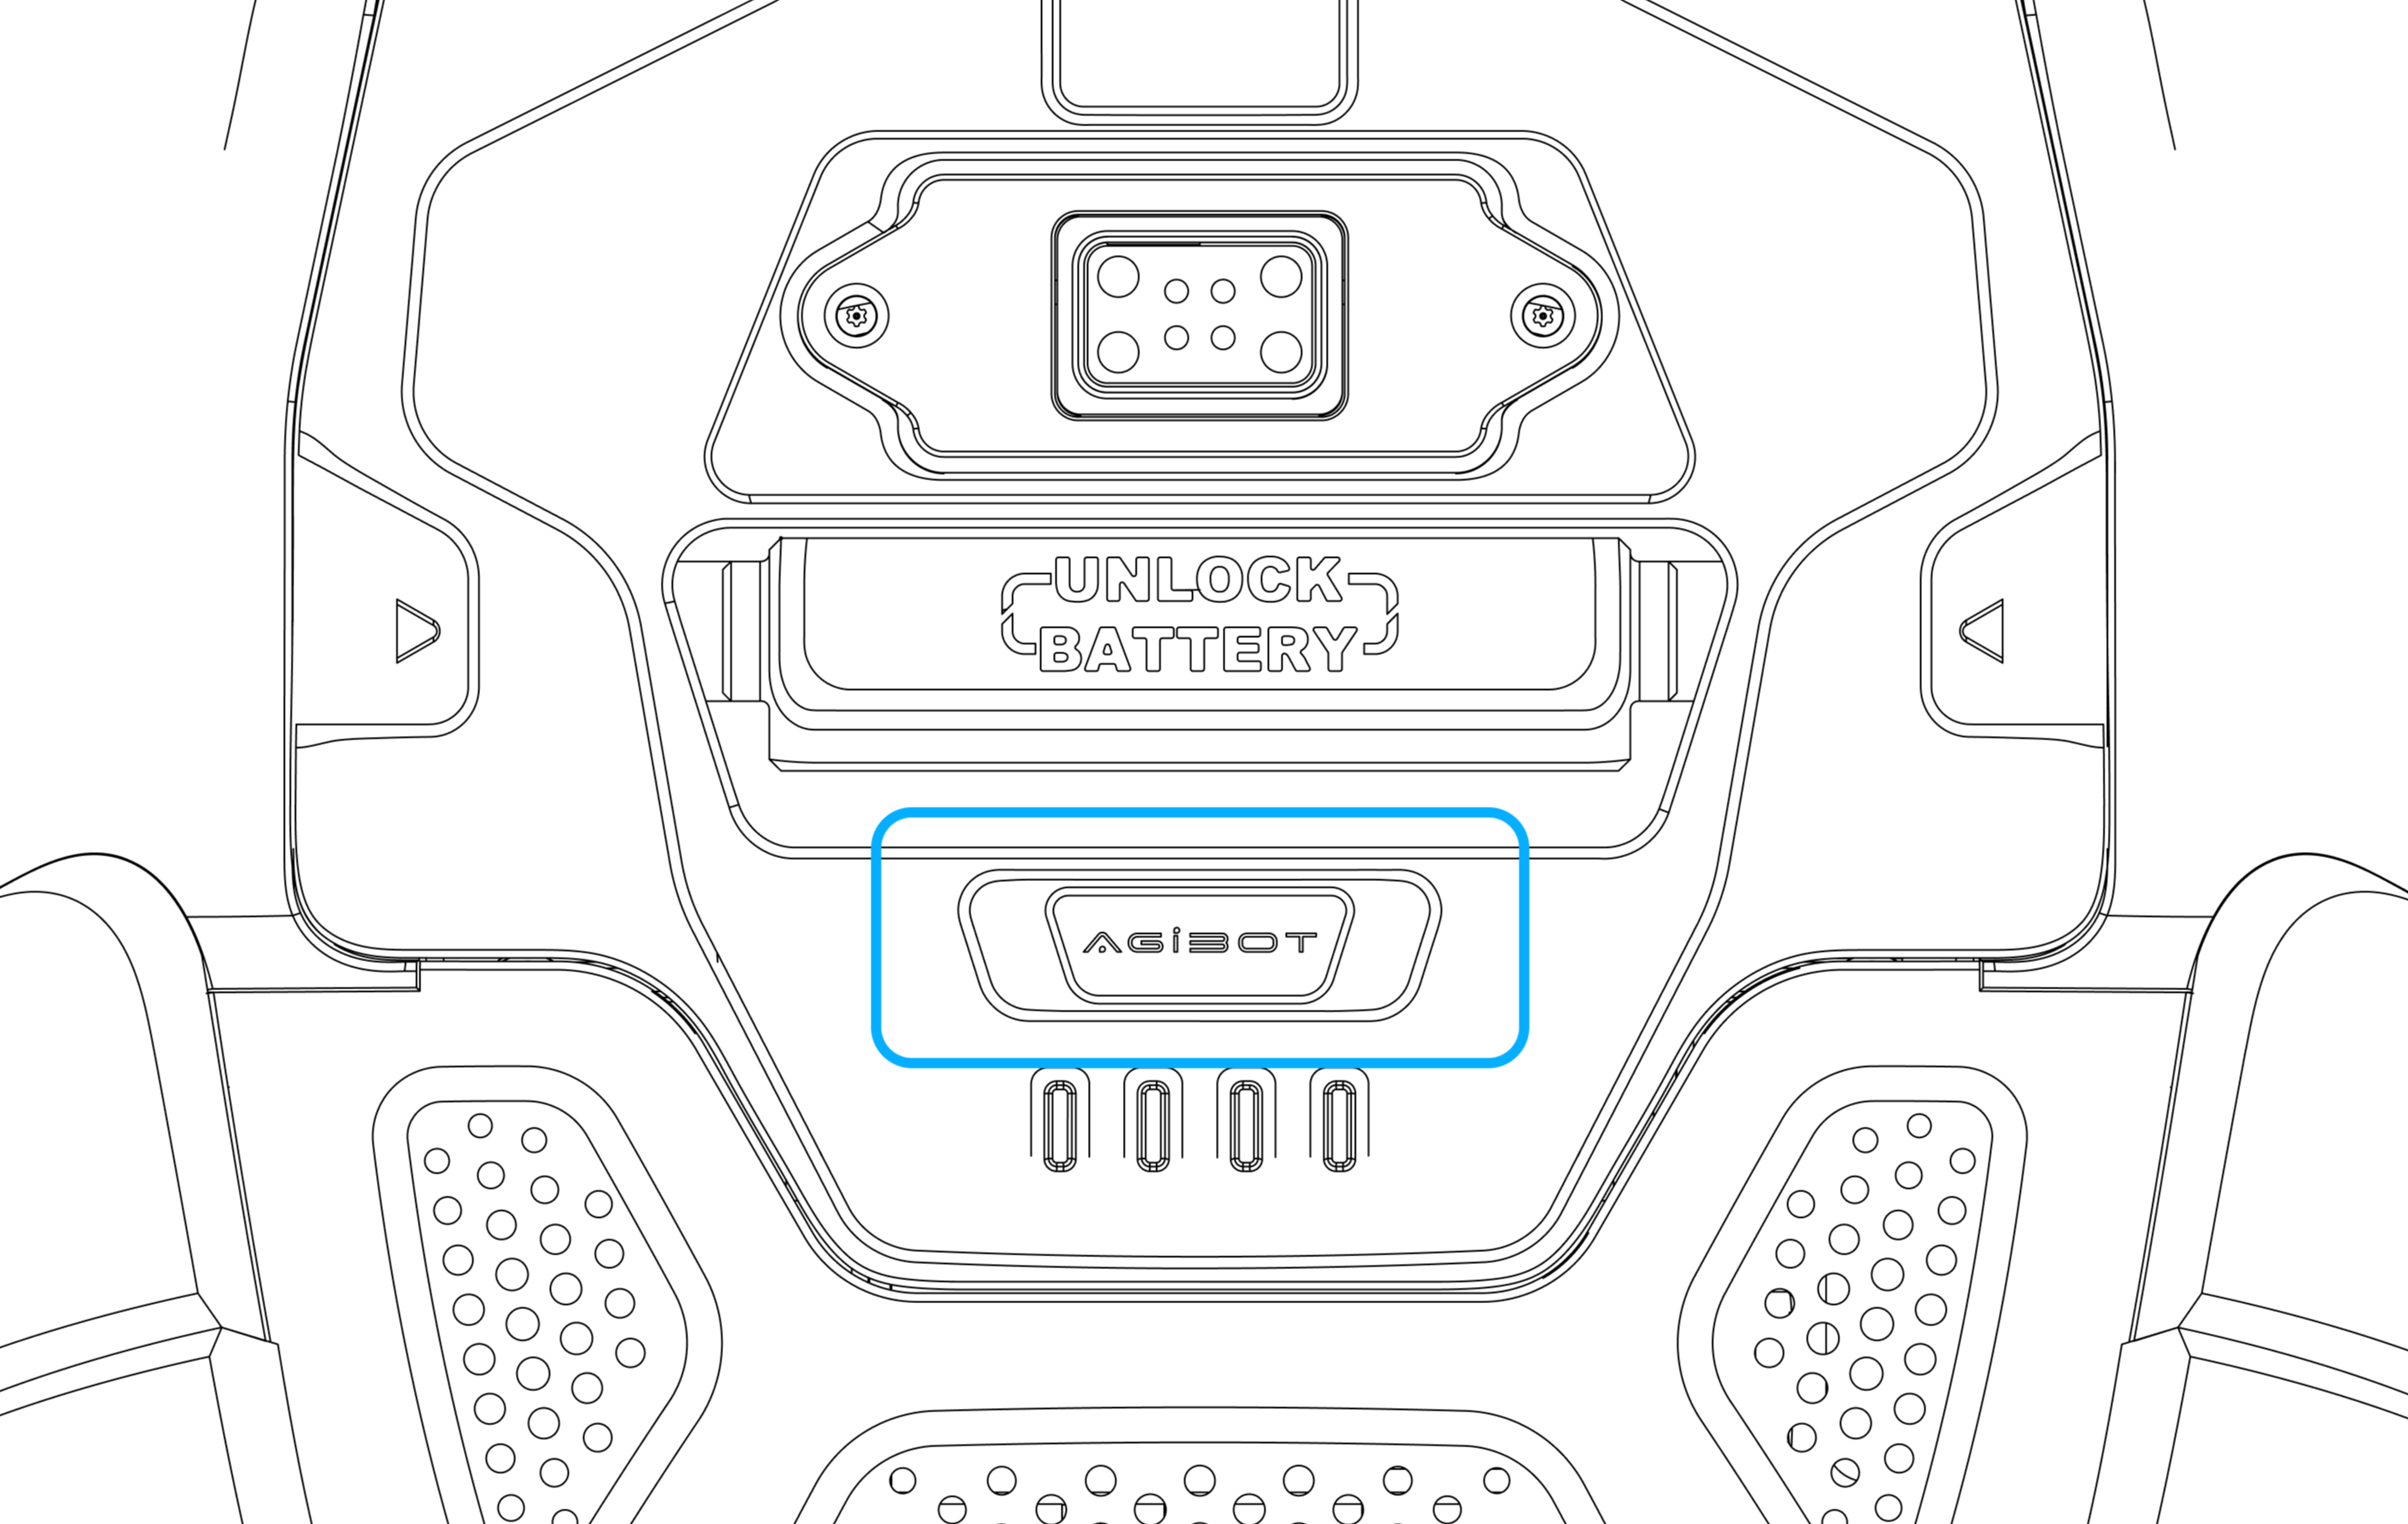
Step 4: Power Off
Short-press the power button on the back of the battery to wake the device, then long-press for about 5 seconds to shut it down.
During shutdown, the LED1–4 indicators on the battery will turn off sequentially, indicating the device has powered off.
Step 4: Press the Power Button
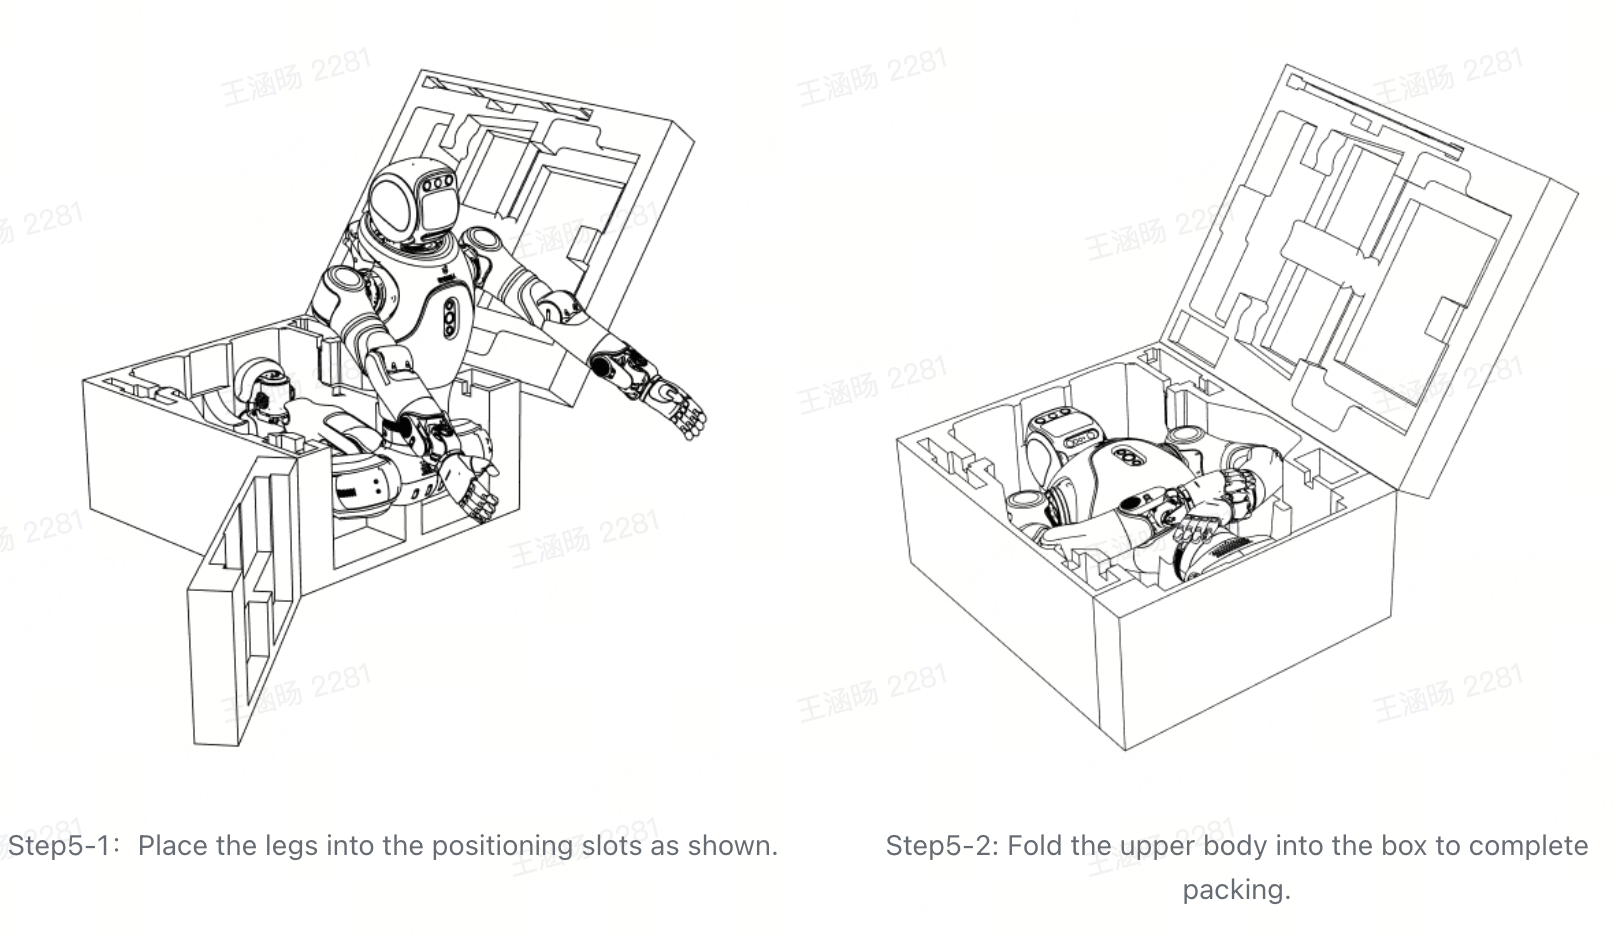
Step 5: Pack the Robot as Illustrated
Open the side door of the packaging case and ensure sufficient space for placing the robot inside.
Follow the illustrated steps: place the robot’s legs into the positioning slot first, then fold and place the upper body into the case.
Ensure all parts of the robot are securely positioned in the slots, then close and lock the case.

2.4.2 Shutdown from Sitting Posture (No Gantry Required)
Step 1: Use the Controller to Make the Robot Sit
Short-press [L2 + ←] on the controller to trigger the robot’s sitting action.
Place the robot on a stable platform or stool with a height of 35–40 cm to ensure proper support.

Step 1: Trigger the Sitting Motion via Controller
Step 2: Enter Zero-Torque Mode
Ensure the robot is sitting stably and facing forward, then switch to Zero-Torque Mode with the controller for safe shutdown.
During the state transition, support the robot from the rear handle or ensure its back rests securely against a chair to prevent falls in Zero-Torque Mode.
Recommended Procedure (Safer):
Switch to Damping Mode first: short-press [L2 + R2 + Create].
Then switch to Zero-Torque Mode: short-press [L1 + R1 + Create].
Emergency Stop: If immediate stopping is required, directly switch to Zero-Torque Mode via the controller.
Step 3: Power Off
Short-press the power button on the back of the battery to wake the device, then long-press for about 5 seconds to shut it down.
During shutdown, the LED1–4 indicators on the battery will turn off sequentially, indicating the device has powered off.
Step 3: Press the Power Button
Step 4: Pack the Robot as Shown
Open the side door of the packaging case and ensure sufficient space for placing the robot inside.
Follow the illustrated steps: place the robot’s legs into the positioning slot first, then fold and place the upper body into the case.
Ensure all parts of the robot are securely positioned in the slots, then close and lock the case.
Important
During the sitting operation, ensure the robot is securely positioned on a 35–40 cm-high stool or platform with proper back support.
When switching from sitting posture to Zero-Torque Mode, manually support the robot from the rear handle to maintain balance and prevent falls.